Ben Dodson

Freelance iOS, macOS, Apple Watch, and Apple TV Developer

Portal 2 on the new iMac (10.6.6)

Today I purchased one of the brand new iMacs that were released yesterday. One of the first things I installed was Steam and Portal 2 (as I'm looking forward to playing co-operatively with a friend on Windows) but I was surprised when trying to play that it required OS X 10.6.7

Portal 2 requires Mac OS 10.6.7

This is surprising because 10.6.7 has been around for a little while now so why wasn't it on the new iMacs by default. After trying a system update, I found that there was no update for the 10.6.6 iMacs and other people had tried the Combo Update downloadable from Apple to no avail.

After downloading all of Portal 2, I decided not to give up easily and see if there was a way around it. Developers are generally lazy and so they are probably just checking for the string 10.6.6 in the system version. As this version of 10.6.6 has all of the drivers for the new graphics card required for Portal 2, I thought there would probably be no harm in changing that system version to 10.6.7 to get past the Steam requirements. Turns out I was right!

To get your copy of Portal 2 running on your new iMac, navigate to /System/Library/CoreServices/ - now copy the file SystemVersion.plist to your desktop and open it for editing. Change the references to 10.6.6 to 10.6.7 and save. Now you'll want to delete the existing version and then copy your new file in it's place - you will need admin rights to do this.

Once that's done, fire up Portal 2 - you may get the "System requirements failed" message but if you press "Continue anyway" then Portal 2 will load and be perfectly playable (at 1080p).

Now, go forth and continue testing!

Note: when a 10.6.7 fix does come available for the new iMac, you should probably edit the SystemVersion.plist file and change the references back to 10.6.6 just to make sure nothing bad happens...

[20/05/11] Update: OS X 10.6.7 is now available through System Update for the new iMacs - make sure you reverse the process above before updating.

Review: Worldictionary for iOS

Worldictionary is a translation app for iPhone that allows you to use the built-in camera to detect and translate words on the go. The only language I understand other than English and the various programming languages I've picked up is Latin, so an app to help me understand various signs and documents in foreign countries is definitely useful for me!

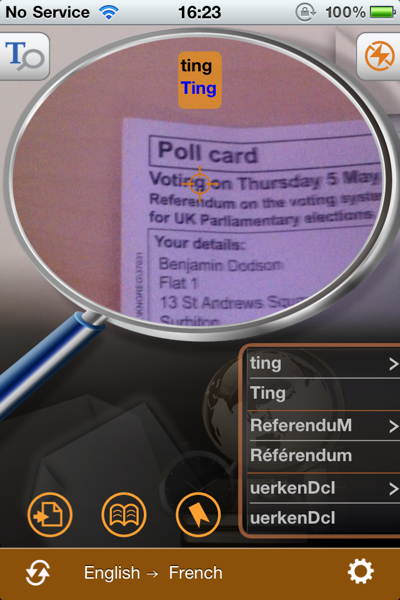
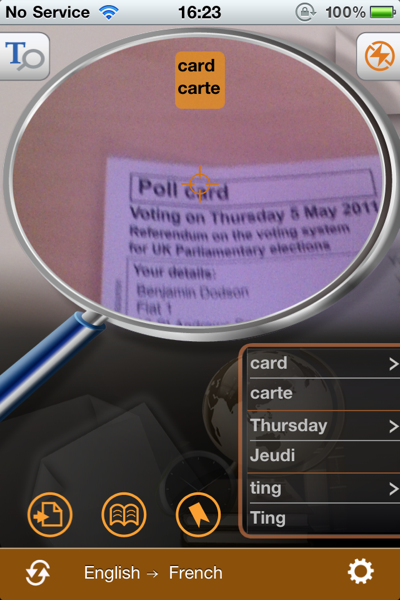
Translating from English to French

When you launch the app, the camera is activated and you can instantly begin translating. All you need to do is line up the magnifying glass with the word you want to translate and it will automatically appear at the top of the app. The word it thinks it detects is displayed on top with the translation underneath.

Translation mistakes

As you can see from the image above, the camera doesn't always detect words cleanly (more examples can be seen from the history panel in the bottom right corner) but it is very fast at detection so these issues don't interfere too much. The app isn't designed to work with handwritten fonts but should work with anything in a regular font. The example document I'm using is a polling card for the upcoming election referendum here in the UK.

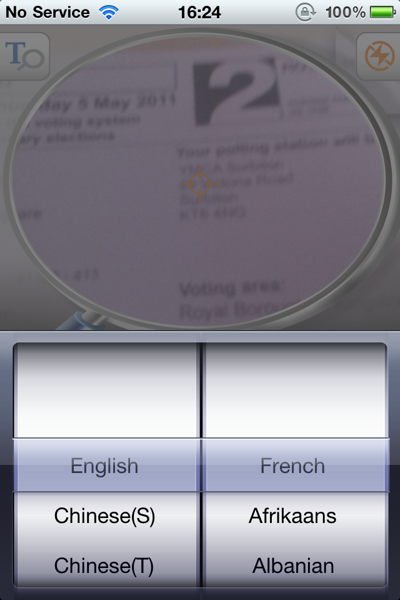
Language selection

To change the language, tap the bar at the bottom of the app which brings up a scrollable view listing an impressive number of languages to convert to and from. These are all available by default so there is no in-app purchase for language packs as per some other translation apps.

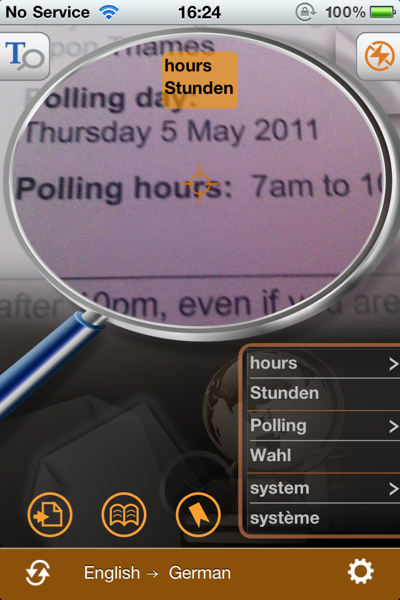
Translating from English to German

Once a new language is chosen, you can start translating instantly. I was struck by how fast detection and subsequent translation was and I experienced no problems with the app such as crashing or memory problems.

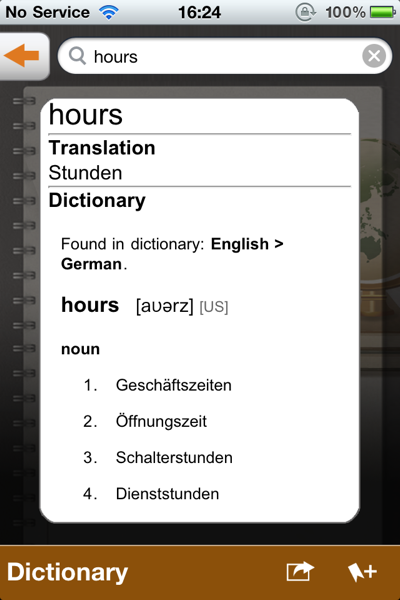
Translation results

You can tap the translated words or tap any previous translations listed on the right hand side of the app to go through to a more thorough translation detailing example usage, structure, synonyms, and definitions from the web (including services such as wikipedia and online dictionaries).

Whilst the translation is good and the app does what it says, I did encounter 2 problems which may stumbling points depending on your usage.

Firstly, the app only detects single words, not sentences or paragraphs both in camera mode and the manual input mode. This might be fine for the odd word lookup but isn't terribly useful for something more involved such as a menu or road sign. Also, without understanding sentences, words in some languages may not make sense (as many languages have words with different meanings depending on the surrounding words). Whilst understanding full sentences is still difficult for translation algorithms, I do think the app would work better if it could at least do the per-word translation on an entire sentence so you don't have to slowly input each word individually.

No translation without network access

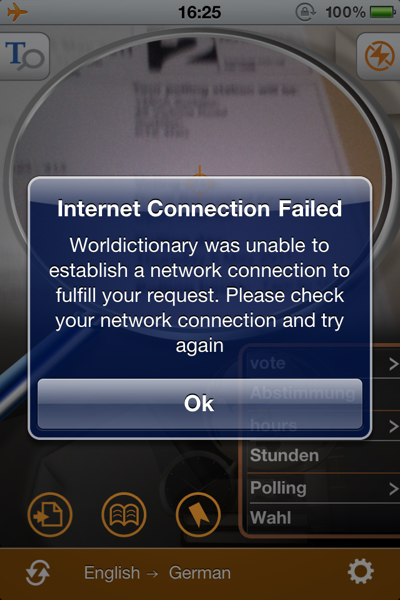
The second problem is more important from my perspective but is also something that is unlikely to be fixed; you need to have internet access in order to perform translations. This is because the translation engine being used is Google Translate and therefore doesn't have offline access. The reason this causes problems is that many people travel abroad where data roaming charges are still completely excessive (I was charged £6 per MB whilst I was in the US recently) and therefore switch their data roaming off. The benefit of a translation app is that you can use it anywhere when you need it (e.g. translating a menu at a restaurant) and you may not have WiFi available - turning on the data roaming for translation could become an expensive habit, particularly if you haven't turned off other apps or push notifications before making the switch. Whilst the API calls the app makes should be fairly small, I'd be more worried about forgetting to turn off data roaming after I'd used the app.

Whilst these problems are present in other apps, there are some which manage to solve both of these such as Word Lens which gained a lot of publicity when it first launched due to the clever way in which it uses the camera not only to translate, but also to place the translated words back into the original camera image. It might be a more expense app with translation packs at £5.99 each, but it works offline and can translate whole sentences (in a very cool way). Unfortunately, Word Lens only works with English and Spanish translations so is not terribly useful if you are going to France or Germany for instance.

Worldictionary is a clever app with its word recognition and fast translations (depending on network speed) but its lack of sentence recognition and reliance on internet connectivity lets it down. If you can look past these issues, then I can recommend it as a good translation tool for those times when you need a rough translation or have a need for multiple languages.

Worldictionary is priced at £2.99/$4.99 as is available in the App Store.

Disclosure: I was given a free copy of this application to review. I tested it on an iPhone 4 running iOS 4.3.2. If you have an app for iOS that you would like me to review, please contact me.

iTunes TV Artwork Script

I have a large amount of TV shows stored in iTunes but not all of them were purchased there, particularly as you can buy a Blu-Ray of many TV shows for a fraction of the price of a Standard Definition download. The only issue I've had is that I lacked artwork for each of these shows. In the past, I'd just screenshot the 200px or so image that showed up in the iTunes store and use that, but since getting an Apple TV (which displays the artwork at a much larger size) I decided I needed a better solution. After a weekend of sorting out my iTunes library, I decided to take a look at the iTunes Search API and see if I couldn't find a way of getting that artwork. They provide a 100x100px thumbnail as part of the API response, but fortunately (with some URL experimentation) I found a way to get the full 600x600px artwork.

 You can find the working version on my projects page but I thought I'd share the code briefly below so you can see how it's done and adjust it for any other media available on iTunes (e.g. movies, music, apps).

<?php
$search = $_GET['show'];
if ($search) {
	$url = 'http://ax.itunes.apple.com/WebObjects/MZStoreServices.woa/wa/wsSearch?term='.urlencode($search).'&country=us&entity=tvSeason';
	$obj = json_decode(file_get_contents($url));
	$results = array();
	foreach ($obj->results as $result) {
		$data = array();
		$data['url'] = str_replace('100x100', '600x600', $result->artworkUrl100);
		$data['title'] = $result->collectionName;
		$results[] = $data;
	}
}
?>

As you can see, it makes a fairly standard API call to the US iTunes store (as that has far more content than any of the others) which returns a lot of information about the particular entity (in this case a TV series). However, the artwork URL provided is only good for a 100x100px image so I us a basic str_replace to change that to 600x600 (the only other size I've found that works is 200x200). Once that's done, I grab the title and stick it all in an array to loop through later - simple!

Hopefully this script will be of some use to you - it's certainly made my library look a lot nicer when browsing on an iPad or an Apple TV!

Gamification, Social Validation, Gowalla, and moving on from Wallabee - What I learned at SXSW

Since childhood, I’ve been a huge fan of maps and the concept of location. I used to spend hours drawing maps of the neighborhood where I lived and reading books and magazines about different countries and places around the world. Much later, I became a web developer and would spend a lot of time playing with the Google Maps APIs and creating mashups with the FireEagle service. When the iPhone came out, I was hooked; not only for the simplistic UI (I could write an entire blog on how less is more with UI) but by the fact that your location was always in the palm of your hand. Once the iPhone SDK came out, I switched careers purely because location-based apps were the stuff of my dreams and that’s what I wanted to spend my time on.

 Earlier this month, I headed to Austin for my first experience of SXSW. Whilst many people (myself included) went for the talks and networking opportunities, I was mainly interested in meeting the people behind Gowalla, a location-based service I’ve spent a lot of time with over the past 3 years. In Austin, I was staying with a group of friends who had come not for SXSW, but to collect the rare items and pins that would be available through Gowalla.

The purpose of this blog post is to explain what I’ve learned about the future of location-based services both from talking to Gowalla employees, and watching how people play Gowalla in the real world.

Gamification and Social Validation

One of the key buzzwords of SXSW 2011 was “gamification” which is loosely defined as:

The use of game play mechanics for non-game applications, particularly consumer-oriented web and mobile sites, in order to encourage people to adopt the applications

In the same way that apps add “tweet this” and “facebook that” buttons in order to tick the box for social media, it seems that the future is based around the idea of adding a game layer purely because other apps have one. These mechanics tend to be of the badge variety which works by giving the user digital badges for reaching certain goals. Some go further by giving you physical things (e.g. stickers) rather than digital items.

In addition to gamification, there is also the proliferation of the “check in” model of thinking. This is the idea that you can now check in to anything be it a location (Gowalla, Foursquare), TV shows (Miso, Glue), Books (GoodReads), or just about anything else you can think of. When the models are combined with social networks like Twitter of Facebook, it seems that most applications are generally designed to do 2 things; either tell people what you are doing or show-off to other people about how good you are at a digital task.

For me, the best talk at SXSW was by Josh Williams, CEO of Gowalla, in which he discussed the future of location-based services in a talk entitled “Where are we going”. The candid presentation talked a lot about where services had gone wrong but was also self-admittedly contradictory (especially when you look at the Gowalla service overall which I’ll come onto later). However, he had one key slide which I think resonated with everybody in the room:

Social validation is the primary driver for activity on today’s web

This is a profound idea that suggests the reason that people play with game layers, send tweets, check in on apps, and use social networks and services is purely based on egotism; we do things not because we want to, but because we want to be accepted by society. This is not a new idea, but it is one that I think a lot of people have been blind to for a long time. With one sentence, Williams had made me uninstall a number of apps on my phone and take a fundamental look at the projects I was working on and the people I was interacting with.

Another key quote from the talk was:

Game mechanics are subservient to the usefulness of a service

Whilst this one didn’t hit me with as much impact as the piece on social validation, it’s something I’ve not been able to stop thinking about over the past few weeks. Social validation is the main reason people use a game mechanic but what is the driver for playing a regular game, watching TV, or reading a book? After thinking on it, I’ve concluded that the driver for offline tasks tends to be story, whilst online we tend to want to share our story. By way of example, I might watch Mad Men as I enjoy the plot, but I’ll tweet about it because I want social validation.

This describes the correlation between offline and social networking well enough, but what about game mechanics? These were created in order to incentivise a story action but tend more often to promote the idea of social validation. An interesting game mechanic to look at would be something like Xbox Achievements or PS3 trophies. These were designed to extend the life of a game by adding extra challenges that weren’t part of the main storyline yet have now evolved into an exercise in social validation. People will now play games not because they are interested in the game itself but because they want a higher gamerscore. I’ve seen (and been a part of) this idea myself and it’s only when I think about it that I realise that the best games I’ve played are generally the ones which don’t have achievements. Games like Zelda and Final Fantasy are good because of the story and core mechanic, not because they improve my gamerscore. I’m not saying that all achievements are bad, but I do feel that a game like Assassins Creed II is detracted from when players are performing tasks such as collecting 100 feathers for the sole reason of improving their gamerscore.

Whilst console games can have both this social validation aspect and a good storyline, a worrying trend with most new game mechanics and online games is that they don’t have the story portion at all. For instance, what is the point of Farmville? There is no ending, there is storyline, it is simply a game based around social validation. So it is for services like PackRat (made by the same people as Gowalla) in which you can collect items simply for the purpose of showing other people. Both these games (and others) have an element of a game currency (for purchases of items in the game world) which can be topped up with real money. You therefore end up actually paying real money to purchase items in a digital world for the sole purpose of showing them off to other people. I eventually stopped playing PackRat when I came to the realisation that I was spending money and time (sometimes jumping up when new items came out so I could be the first to get one) on a service which actually had no benefit. I maintain that the reason for this is that there is no ending - users might spend time collecting all the Pokémon on a Nintendo DS as they know there is an ending, but with Farmville, PackRat, et al., the whole thing is continual.

Gowalla: A game of two halves

So, what of location-based services? Gowalla has a difficult task ahead of it currently as it is walking a line of two different concepts; the idea of exploring the world and the idea of collecting items. I believe these can be defined as story and social validation respectively.

Gowalla have used variations of “explore the world” since they first started and it is one of the key things that drew me to them. With their beautiful artwork, it was easy to imagine that your travels were like those in the past where travelers would place a sticker on their suitcase from each place they visited. The concept of a digital passport imitating the real world was exciting and they have done a great job of extending this with featured spots and trips. More recently, highlights and notes have allowed users to show where there favorite places are both publicly and privately and encourage other people to visit those locations. One of the most interesting pieces they are working on is in telling the “story” of your travels. This has begun with them joining your flights together and showing the distance (and connecting flights if applicable) when you check-in at 2 or more airports in a row. They used this feature to award a special pin for those that had travelled to SXSW when they landed back at their originating airport (so I got mine at Heathrow after travelling back from Austin airport). Williams has been mentioning for a long time that these flight updates are “just the beginning” and I can envisage a future in which they can build up a digital holiday keepsake for you (complete with photos, highlights, check-ins, and tweets) by using this information.

However, the other side of Gowalla is one based on a game layer. Items have long been a sore point to many users (including myself for a time) as they were one of the key features that differentiated Gowalla from other location based services (such as Foursquare). As most new users were coming from PackRat, it is easy to see why items were such a key part to many peoples experience. However, like the never-ending gamification I described earlier, there is no ending for items. Once you have them all, you don’t get anything as a new one might be released next week. Therefore there is no end and no purpose to collecting them other than to show off to other people for social validation.

Gowalla have been slowly trying to lessen the importance of items within the game in order to focus on story, but as they have done so the community has been more and more vocal about the changes. One of the changes was to make it so that checking in to more than 5 places within an hour would trigger a switch preventing you from receiving items for the next 24 hours. This was at odds with the “collect them all” aspect of items which require checking in all over the place in order to get them but was done in the interest of making people check-in where they are right now rather than checking-in everywhere within 5km (the current distance you are allowed to check-in from your actual location) just to get items.

Unfortunately, I was privy to many embarrasing moments at SXSW where the Gowalla team were subjected to people complaining about items, check-ins, and the other aspects that I’m sure Gowalla don’t really care about (as they don’t build on the story mechanic). I saw some of the most childish outbursts I’ve ever seen in my life over something as simple as a digital item and it really put me off items as a whole.

In my opinion, Gowalla need to cut items lose in order to really grow as a service. Judging by the complaints on their GetSatisfaction pages, I’d say that the vast majority of complaints are about the game mechanic rather than the overall service and its story elements. If they were to cut off the game mechanic, Gowalla would lose a lot of users, but they’d be able to focus on the key part of the service; “seeing the world”. This in turn would build a better product and allow them to regain users who share their vision rather than trying to maintain the careful balance they have at present.

My current belief is that items are slowly being fashioned into rewards, a feature that was launched at SXSW. With rewards, some of the digital items you find are actually usable as promotional offers (so you might get a “free taco” item which allows you get a free taco when you check-in at certain locations). If they removed the non-reward items, they could have a social layer which has a purpose and isn’t tied so intrinsically with the limitations of exploration. By that, I mean that people would be encouraged to check-in only where they are currently, and by doing so they may receive one of these promotional rewards. Once a reward is used, it should then be archived as it then serves as a history of the promotions you’ve earned (which are a story in themselves). By doing this, you no longer have a part of the service which encourages multiple check-ins for items which have no value beyond social validation.

I have no idea if this is there current plan, but it seems a sensible way forward.

Wallabee: A project based on Gowalla items

If you’re familiar with my projects, you’ll know of a service I created called Wallabee. It’s a website (and set of apps) that build on the Gowalla API and basically dishes out a lot of information about items in particular. I originally created it as I wanted an easy way of finding out which types of spots items appeared at. Items were a fun feature at the start of Gowalla and I would travel to whole new places just to pick up an item - I used to think I was doing this because I wanted items but I eventually realised that I was enjoying having a reason to go to new places and “see the world”. Once I made the site public, it gathered a large following and has grown into various things since. There are apps, item hunters, tools to show Flickr photos at different spots, and a new guide which introduces players to key Gowalla concepts (as Gowalla itself has no tutorial). However, the most popular things every time have been things to do with items (which is confirmed by a new feature I built recently called the Item Directory which shows people where every item can be found in real time).

After SXSW and thinking on both the attitudes of people I’d seen and the talks I’d heard, as well as mulling over everything I’ve said above with regards to social validation, gamification, and the future of Gowalla, I decided that I just didn’t want to do this anymore. I’ve been working on Wallabee in its various incarnations for two and a half years and it wasn’t until I took a step back that I realised everything I was doing was based on items. I’m not interested in Gowalla items. I haven’t even been actively trying to collect them myself for the past year (yet I seem to have got them all just because of my slow check-in rate) so why am I building free apps based around them? I realised that I was doing it not because I wanted to, but because it was what most of the followers I’d gained (by starting with item-based tools) were asking for.

I’ve therefore decided to stop working on Wallabee and instead focus on building location-based apps that extend the story aspects of travel rather than the gamification aspects. If you’re a Wallabee user, then you’ll want to read my post on the Wallabee site about how this affects you, but basically I’m handing the site over to another developer who is interested in the gamification layer and in building upon the brand I’ve created.

I will still be using the Gowalla API and the Gowalla service as I think it shows great potential and is a genuinely exciting location-based service. I’ll be doing this under my own name rather than the Wallabee brand, however, and the apps will mostly be of a paid nature. This begins soon with a completely new app which I’ll be releasing shortly.

To the future

This blog post ended up being about five times longer than I intended but I hope it gives you an insight into what I think about location-based services moving forward as well as some of the social issues around game mechanics. To finish, I’d like to take one more quote from Josh Williams talk at SXSW:

Stay true to your vision

I lost track of my vision when I started developing tools that I wasn’t using myself. I’m looking forward to returning to my vision by creating new apps that will help people explore the world around them.

Mobile OS Updates: Android vs iOS

Over the last couple of months, I've been using two competing phones day-today; a Nexus S (Android) and an iPhone 4 (iOS). Whilst there are many differences and similarities, one of the things I want to talk about today is the different ways in which they deal with updates to the core operating system. System updates are a crucial part of the mobile experience - sometimes they offer major new features but they are usually minor updates to deal with bug fixes. So how do Apple and Google deliver their system updates?

Android

The Android platform updates itself via an "over-the-air" system which appears to rely on individual carriers to push out system updates. Due to the large number of different devices, certain updates will only appear for certain phones and this fragments further by region and carrier. For example, Android 2.3.3 came out 2 days ago and only runs on the Nexus S at present - whilst a number of customers in the US have received the update, my Nexus S is still refusing to detect an update from 2.3.2 leaving me to conclude that it is waiting for my carrier to push it out. However, when an update does appear, the process is very slick. A notification appears to let you know you have an update including details of what this adds and the size (which for minor updates tends to be a couple of MB). One tap starts the download process and, once complete, the phone reboots and you're up and running. At no point do you need to plug into a computer or even connect to a wireless network. It's very impressive. However, the lack of cohesive strategy on when updates will appear and on what devices they will work on causes the whole process to be a bit of a disappointment, especially when you're waiting on a major bug fix or new feature.

iOS

The iOS update system is very different. Each update requires you to plug your iPhone into iTunes where an update will then download and sync to the phone. Each update includes the entire OS, rather than an incremental update, so is typically around 450MB (depending on device). This takes a long time to download but then takes about the same time again to install onto the device. The advantage to this process is that if something goes wrong you can restore from a backup immediately (whereas on an Android phone in the wild you'd be stuck without a phone). Also, when an update is available, it is generally available globally within 2 hours of release and there is a button you can press to check for updates manually. Apple also post a direct download link on their support boards so it is generally fairly easy to get an update regardless of your location or carrier. However, the lack of an over-the-air facility and the massive downloads are very tedious.

Update Statistics

When you look at the two download mechanisms, one would expect that Android users would update their phones more frequently than iOS users, particularly as the update is delivered directly to the device. However, the lack of support for devices and the requirement for carriers to approve updates means that only 0.8% of all Android users are currently running OS 2.3, with 57.6% on 2.2, 31.4% on 2.1, and the rest on pre 2.* software. It is difficult to contrast fairly with iOS as Apple don't release breakdown usage stats, but by looking at the usage figures the major apps are publishing you can get an idea. The number of users running iOS 4.* is around 90% with over 50% on the latest build of iOS 4.2 - there are only 10% running the previous generation family of 3.x and these are most likely users on the original iPhone and iPod Touches that aren't able to upgrade to iOS 4.0

Android Figures accurate as of Feb 2nd, 2011 (from Wikipedia)
Android 2.3 (Gingerbread): 0.8%
Android 2.2 (Froyo): 57.6%
Android 2.0/2.1 (Eclair): 31.4%
Android 1.6 (Donut): 6.3%
Android 1.5 (Cupcake): 3.9%

iOS Figures based on "Bump" application as of Jan 14th, 2011 (from Quora)
iOS 4.2.1: 52.89 %
iOS 4.2: 0.09 %

iOS 4.1: 27.50 %

iOS 4.0.2: 3.36 %
iOS 4.0.1: 2.95 %
iOS 4.0: 2.94 %

iOS 3.2.2: 0.49 %
iOS 3.2.1: 0.07 %
iOS 3.2: 0.10 %

iOS 3.1.3: 6.43 %
iOS 3.1.2: 2.52 %
iOS 3.1.1: 0.10 %
iOS 3.1: 0.21 %

iOS 3.0.1: 0.10 %
iOS 3.0: 0.22 %

iOS 2.2.1: 0.02 %
iOS 2.2: 0.00 %

Conclusions

I'm still keenly waiting for my update to Android 2.2.3 as it adds, amongst other things, a new feature which enables the NFC chip in the Nexus S to write to tags as well as read from them (something that should have been there from the start in my opinion). However, until my carrier pushes it out, I have to wait whilst other developers on US carriers get a head start. This would be fine for the average user normally, but I fail to understand why Google aren't hosting a manual update? An over-the-air update is convenient, but if there is a major bug fix then you should be able to download the update manually and do a tethered sync at the same time that Google pushes the update live.

The iOS system seems more archaic in that the updates are massive and you need to manually update, but the way in which Apple publicise the updates seems to ensure that users are updating. Whilst the statistics above aren't wholly reliable, it shows a trend that users are aware of iOS updates and willing to plug in and upgrade. From my own anecdotal evidence, I've seen similar high numbers of upgrade take-up with many non-technical people in my family running the latest version of iOS without any help to do it.

The way that Apple has done this better is that they a) publicise a new release (going to android.com shows nothing about 2.3.3 aside from a blog post on the developer board directing you to download the SDK) and b) have a "check for updates" button that you can click when you hear that an update is available. The Nexus S has a "System Updates" section within "Settings" but this only shows updates you've already been told about rather than forcing an update check. From searching around the internet this afternoon looking for the update, I found a number of posts extolling the virtues of dialling *#*#2432546#*#* (which is *#*#checkin#*#*) which forces the device to do a checkin with your carrier and should push any updates that are waiting to you. This is not an update system for the casual user!

Furthermore, Apple have unified their product line so that a new iOS update is immediately able to run on the iPad, iPod Touch, iPhone, and now the Apple TV. There are certain devices which are excluded (e.g. the original iPhone and original iPod Touch) but these are well highlighted. With Android, I have no idea which phones can or can't update and if there are technical limitations for this (as with the iOS updates) or simply the carriers not being bothered. From some reports, it seems that the carriers are loathe to push out functional updates as they detract away from new products they are selling...

Overall, I think Apple needs to take some of the improvements in updating that Android has made such as pushing out incremental updates rather than forcing you to redownload the OS, and allowing you to update the OS without connecting to iTunes (even if this is only over Wi-Fi). However, the major problem with Android is that it is stitched up with mobile carriers, something the iPhone broke away from. When this extends to critical bug fixes, then it is the end user that suffers. Apple needs to take some cues from Android in terms of implementation, but Google needs to take back more "openness" from the carriers if they are to provide a sufficient update system.

Review: WorldCard Mobile for Android and iPhone

WorldCard Mobile is one of many applications that allows you to scan in a business card and have the details automatically loaded into your contacts. I haven't used one of these kinds of applications in a long time and so I jumped at the chance to test one when a review copy was sent to me.

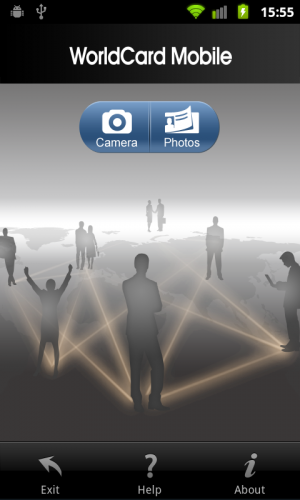
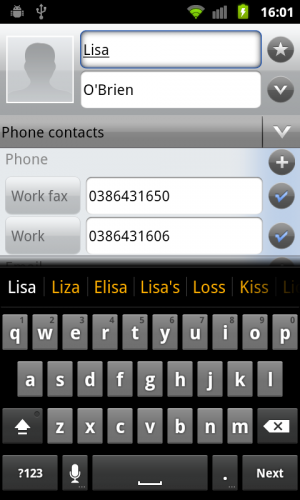
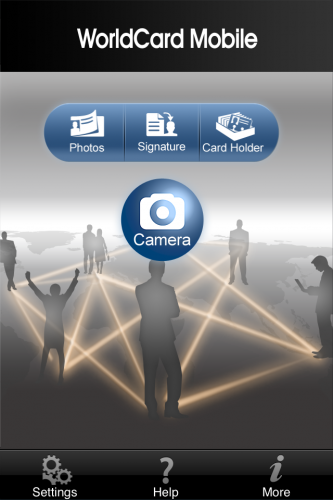
 The opening screen is fairly straightforward with the option to start scanning either by taking a picture with the camera or using a photo from your library. There is also an "Exit" button which I disagree with from a UI point of view as that is the point of the physical home button surely? I'm probably being overly harsh as that kind of thing is prohibited by Apple and so I don't come across it much when looking at iOS apps, but I generally frown upon any duplication of standard controls with your own versions (for example, websites that have "back" buttons - that's what the standard browser "back" button is for!) Anyway, I had a business card for one of my friends who works in Australia so I decided to give that a try by using the Camera feature. This loads up a standard camera control and allows you to take your photo. Once captured, you can zoom into the image, rotate it, and choose the correct language from a choice of seven; English, French, German, Italian, Spanish, Portuguese, and Dutch. Pressing the "Recognize" button will then fire up the OCR system that ran in under 1 second on my Nexus S. As you can see, the captured data is incredibly accurate. The only problem was with the word "Lisa" which came out as "Usa" but that is partially due to the closeness of the letters on the business card and me not taking a picture close enough. I was particularly impressed with the intelligent way in which it parsed the data enabling it to set the fax numbers correctly as well as building the company name from the logo and footer and correctly picking out the job title. Editing any information that wasn't correct is very easy with a standard editing dialogue. I quickly fixed the name and saved before then pressing the export button. This sends the contact information into your devices address book. As I already had contact information for this person (pulled in automatically from FaceBook), it simply updated the existing record with the new work related information without any prompting. Overall, I'm incredibly impressed with this app and the very fast and accurate OCR software built into it. If you are frequently given business cards, I would highly recommend it as a quick and efficient way of storing them. WorldCard Mobile costs $5.99 and is available on the Android MarketPlace. There are other versions available at a higher price for recognising Japanese, Chinese, and Korean text. You can find more details at http://worldcard.penpowerinc.com/ Disclosure: I was given a free copy of this application to review. I tested it on a Nexus S running Android 2.3. If you have an app for iOS or Android that you would like me to review, please contact me. Update: WorldCard were kind enough to give me a review copy of their app for iPhone as well. The interface is pretty much the same with very similar functionality although I did notice that the iPhone version allowed you to review your imported cards within the app (rather than just exporting them to the address book as on Android). However, the recognition quality didn't seem to be as impressive as the Android version with several errors being made compared to the one basic error on the Android app. I'm not sure if this is something to do with the code or with the iPhone hardware (although the tap to focus made me think the iPhone would function better) but for now I'll be using my Nexus S to do any business card recognition.

Enabling any HTML5 Video to work over AirPlay

It's taken a little while longer than I expected to but I've managed to put together a script to make any HTML 5 video playable through Safari on the iPad. With the advent of iOS 4.3, Apple are now allowing websites to add a special tag to their video markup in order to enable video streaming (as with the current 4.2 version you only get audio streaming). However, with one simple JavaScript bookmarklet, you can now enable AirPlay video for any website.

 First of all, you'll need to save the following bookmark - the best way is to save the link below as a bookmark on your computer and then sync it to your iPad via iTunes or MobileMe: HTML5 AirPlay Bookmarklet. Alternatively, bookmark this page on your iPad and then copy the text below:

javascript:d=document,e=d.createElement('script');e.src='https://bendodson.com/bookmarklets/ios-airplay.js?'+(new%20Date()*1);void(d.body.appendChild(e));

You now need to edit the bookmark you saved for this page and paste the code above into the URL (you'll probably want to rename it as well).

Once the bookmark is saved, you just need to go to any HTML 5 video (such as cnn.com or tvcatchup.com) online and start playing it. You'll notice if you look at the AirPlay window that you can only stream audio. If you now load the bookmark, the video should disappear, and then come back with AirPlay now enabled for video. This short video below will demonstrate the process a little better:

So how does it work? To get AirPlay to send a video stream in Safari, you need to add the attribute x-webkit-airplay="allow" to the video tag. I assumed that by adding this to an existing video via JavaScript then it would automatically work. However, Apple have been slightly clever and ignore any parameters you add via JavaScript. So, I instead use JavaScript to add the new attribute before cloning the video, removing it from the DOM, and then re-adding it. This re-addition to the DOM seems to trigger something in Safari which causes it to re-read the AirPlay attribute and allow you to stream the video. Please note that this will only work with iOS 4.3 on the iPad with iOS 4.3 on the Apple TV. If you try and stream to an Apple TV running older software, Safari will crash.

This is currently in a very rough stage yet so far has been tested and works with vimeo.com as well as native HTML 5 video on websites such as apple.com - it doesn't work with any HTML 5 video wrapped in a custom skin (e.g. the BBC iPlayer) but who knows what will be possible in the future. If you have any additions or improvements, please get in touch.

Update: A few people have contacted me about embedded videos such as the one on this page. Unfortunately, with Vimeo at least, these don't work as they are packaged up in an iFrame rather than being native <video> content. JavaScript isn't able to access the contents of an iFrame from a different domain due to the cross-domain security policy. If videos are embedded natively, then they'll play fine, but for iFrame content you'll need to go to the original website.

Update: This workaround is still functioning in iOS 4.3 beta 2.

Update: And it is still working in iOS 4.3 beta 3.

Update: And finally, this works in the publicly available version of iOS 4.3 - enjoy!

Update: I've altered the article slightly as vimeo.com is now adding the AirPlay functionality automatically to their website (so I've changed the examples given). I've also added a copy-paste section of code as that may be easier for getting the bookmarklet onto your iPad.

Update: I've taken a look at using this on iOS 5.0 beta 1 but so far the AirPlay functionality isn't working well. This is more likely an issue with the beta (which is fairly buggy).

Update: iOS 5 has changed the defaults for how AirPlay works. This means that all online video is now classed as AirPlay enabled (unless the content provider opts out) making this bookmark now redundant.

iOS 4.3

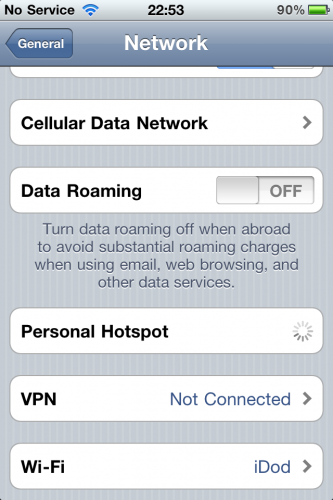
As I predicted yesterday, iOS 4.3 has now become available for developers with the hotspot functionality demoed on the Verizion iPhone 4 now available to all. It works by replacing the previous "Internet Tethering" functionality with everything being included under one banner. This means you can now tether your iPhone via Bluetooth, USB, or WiFI (along with 5 other devices). The carrier support is exactly the same as for internet tethering so if you are already paying for that (or get it for free), then you will be able to use the new hotspot functionality free of charge.

Unfortunately, I can't demo the hotspot at the moment as I don't currently pay for tethering. The reason for this is that my carrier (O2) charges an extra £7.50 per month for an extra 500MB to use for data tethering. You can't use the data allowance you already have. This is in stark contrast to Android in which you can use the device as a Wi-Fi hotspot with no charge at all - it just shares your existing connection. I was rather hoping that Apple would move away from this money-grabbing opportunity for the carriers but it seems not.

In addition to this change, there is also an update for AirPlay relating specifically to the Apple TV. As I tweeted previously, you could enable AirPlay video streaming in 3rd party apps due to a private method on the MPMoviePlayerController class. However, Apple have now made this public with an update for the AppleTV as well. This means that 3rd party apps can now stream video to the AppleTV which is great news for apps such as MLB (which mean I can stream video from my iPad to my AppleTV - no more baseball games on the iPhone for me!). Other changes are mainly cosmetic with a slight rearrangement of the settings panel and some new multi-touch gestures for the iPad. Interestingly, Apple have responded to the controversy around the reassigning of the "orientation lock" button in iOS 4.2 on the iPad by now enabling you to choose whether you want it to act as a silent switch or an orientation lock.

All of these changes are things I'd predicted but I'm really glad to see Apple have implemented them. Video streaming over AirPlay and Hotspot on the iPhone are two great new features. Roll on iOS 5.0!

If you have any specific questions about iOS 4.3, either get in touch via email or chat to me on Twitter.

Thoughts on the Verizon iPhone 4

Verizon have just announced that they'll be selling a CDMA version of the iPhone 4 from February 10th. On the face of it, this news is only really exciting to US customers who don't like AT&T isn't it? Well, yes and no. As an iPhone developer, this news is of great importance to me as more iPhones being sold means more people who can buy apps. That's a good thing! However, for everyone else, the Verizon iPhone 4 has some new features that may make it into the current GSM models of the iPhone. It also points to some interesting changes possibly coming to iOS to combat the increasing functionality that Android offers.

 The iPhone 4 that has been shown today is different to the existing iPhone 4 in two key ways; an antenna redesign and a new "hotspot" feature.

Antenna Redesign

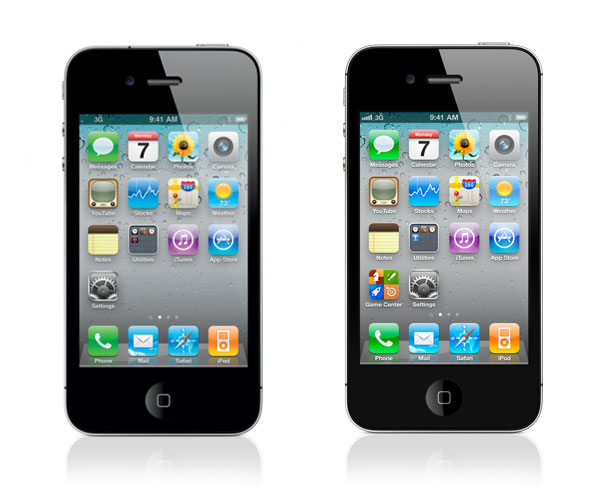
In the photo I've put together above, the current GSM version of the iPhone 4 is on the left whilst the new CDMA version is on the right. You can see on the old version that there are gaps for the antenna in the bottom corners of the phone and at the top next to the headphone jack. On the new version, however, there are a total of 4 antenna breaks with one in each corner. Not only does it look nicer, but I'm willing to bet it's been redesigned to fix the Antennagate problem that plaqued the iPhone 4 upon its release. Now that a new case has been designed, it's not beyond reason to think that Apple might silently make any new iPhone 4s they are shipping use this new case design, especially if it improves performance. Alternatively, I would expect the iPhone 5 to have the same basic design as the iPhone 4 but just have a speed boost internally (similar to the iPhone 3GS to the iPhone 3G) so this new design may be suitable for that. Time will tell I suppose!

Hotspot

The most exciting news for most commentators is that the new iPhone 4 has a feature called Hotspot "allowing customers to use iPhone 4 to connect up to five Wi-Fi enabled devices". This is something that Android has been doing for a little while and a feature I use frequently on my Nexus S. With the current iPhone 4, you can tether via USB or Bluetooth but you generally have to pay extra for the privilege (which is a little excessive considering you've already paid for the data). It hasn't been confirmed or denied by Apple, but I wonder if we might not see this functionality introduced worldwide by adding it to the next version of iOS. I have long suspected that iOS would get an upgrade to 4.3 at some point in late January or February and so this would fit in well with the launch date of the new Verizon iPhone 4 (in that it could come bundled with iOS 4.3). Complete conjecture for the time being but it's an interesting idea and shows that Apple is willing to go head to head with Android on features.

Update: Engadget report that the Verizon iPhone that they got to play with after the announcement was running a bespoke build of iOS 4.2.5 and that the Hotspot functionality is built into iOS as "Personal Hotspot". I definitely think this is a contender for inclusion publicly in iOS 4.3

Update: Mac Rumors is now reporting that iOS 4.3 will bring hotspot support to the GSM iPhone 4 but activating it will require carrier support (and potentially charges).

Update: As I predicted, Apple have release iOS 4.3 to developers with the new hotspot functionality in place. It replaces the existing internet tethering feature so still costs money on some carriers (alas). For more information, read my full article on iOS 4.3.

The AirPlay Alarm Clock: Turning an Apple TV or Airport Express into an Alarm Clock with AppleScript

This article is now outdated and the code no longer works with modern versions of iTunes. Please read my updated article to see how to create an AirPlay alarm clock with iTunes 11 and iTunes 12.

Original article:

I was recently reading through some of my old blog posts when I discovered an article that is still fairly popular about controlling a mac mini via an iPhone. I had an old mac mini lying around and so installed it in my bedroom as a device which basically acted as an iTunes library and alarm clock. Times have changed though and I no longer have a mac mini in my bedroom; I have an Apple TV. With the recent news about iPhone alarm clocks failing to go off (again) and lots of hacking projects with AirPlay to try and stream more than just YouTube videos, I decided to work on something this evening I've been thinking about for a little while; turning my Apple TV into an Alarm Clock. The basic idea is that at a set time in the morning, the Apple TV will wake itself up automatically and start playing a set playlist from my shared iTunes library. The first step would be to get audio playlists working, but the ultimate goal would be to have video alarms as well. Thanks to a bit of AppleScript, I've managed to cook up a basic app to do just that.

So, how does one go about creating an AirPlay Alarm Clock? First of all, you will need a mac that is turned on with a shared iTunes library of content. The "turned on" bit can be automated from System Settings i.e. your machine can be asleep but told to wake up 5 minutes before your alarm is due to go off if you want to save energy. You will also need an AirPlay compatible device - this can be a set of speakers plugged into an Airport Express, one of the new AirPlay compatible iHome speaker systems, or an Apple TV. Please note that video playback will obviously only work on the Apple TV although you will get the audio from the video if you select an audio-only device. Once you've got those, you'll need to make a small tweak to your OS X setup: if you go into System Preferences and then Universal Access, you'll need to enable access for assistive devices - this is so AppleScript can make keypresses on your behalf.

Ok, on to the code:

set AppleTVName to "Bedroom Apple TV"
set PlaylistName to "Alarm"

activate application "iTunes"
delay 0.2

tell application "System Events"
	tell application "iTunes"
		set visible of front browser window to true
                set the view of the front browser window to playlist PlaylistName
	end tell
	delay 0.2

	tell window "iTunes" of application process "iTunes"
		click button 10 of window "iTunes" of application process "iTunes" of application "System Events"
		key code 125 using {command down}
		delay 0.2
		keystroke return

		delay 0.2

		tell window "Multiple Speakers" of application process "iTunes" of application "System Events"
			activate
			click button 2
			tell table 1 of scroll area 1
				activate
				
				repeat with i from 1 to (count of every row)
					set rowcount to count of rows
					if rowcount > 1 then
						tell group 1 of row i
							activate
							if description of checkbox 1 as string = AppleTVName and value of checkbox 1 = 0 then
								set value of checkbox 1 to 1
								delay 0.5
							end if
						end tell
					end if
				end repeat
				
				repeat with i from 1 to (count of every row)
					set rowcount to count of rows
					if rowcount > 1 then
						tell group 1 of row i
							activate
							if description of checkbox 1 as string does not equal AppleTVName and value of checkbox 1 = 1 then
								set value of checkbox 1 to 0
								delay 0.2
							end if
						end tell
					end if
				end repeat
				
			end tell
		end tell
	end tell

	tell window "Multiple Speakers" of application process "iTunes" of application "System Events"
		activate
		click button 3
	end tell
end tell

tell application "iTunes"
	set shuffle of playlist PlaylistName to 1
	play playlist PlaylistName
end tell

I'll explain all of that in a bit more detail shortly, but for those of you that want to get cracking, you can copy and paste that into the AppleScript Editor that comes free with every copy of OS X. You'll want to tweak the first two lines so that the variables match the name of your device and your playlist. Once that is done, you can save the script as an application. To get the alarm to play automagically in the mornings, you can open up iCal and create a new event (it can be recurring if you want a daily alarm). In the "alarm" section, there is a little known entry called "run script" which you can use to run an AppleScript at a specified time relative to the alarm. If you choose the script you saved, then it will automatically run at the allotted time. Simple!

Warning: This script is currently set to shuffle your playlist so that you don't get the same song every morning. However, if you want to playback video, you have to disable the shuffling as iTunes doesn't like playing shuffled video playlists over AirPlay for some reason. To do that, you need to edit the 3rd line from the bottom in the AppleScript to say "set shuffle of playlist PlaylistName to 0".

If you're a geeky sort of person, you'll probably want to know how all of that script works. Here is a quick breakdown of each section:

set AppleTVName to "Bedroom Apple TV"
set PlaylistName to "Alarm"

activate application "iTunes"
delay 0.2

tell application "System Events"
	tell application "iTunes"
		set visible of front browser window to true
                set the view of the front browser window to playlist PlaylistName
	end tell
	delay 0.2

The first step is to setup some variables in order to make it as easy as possible to change later on. The first is the name of your device (as listed in iTunes) and the second is the name of your chosen playlist. The next two lines tell iTunes to activate (basically open it if it's closed, or bring it to the front if it's already open) and then a short delay to make sure everything has caught up. You'll notice the line "delay 0.2" in quite a lot of places in this code. It is there to delay all activity by 0.2 seconds and is required as AppleScript can sometimes run quicker than the buttons it's pressing - by adding the delays every so often, it ensures that you aren't trying to access windows or menus which haven't yet appeared. If the script isn't working for some reason and you have an old machine, try increasing the delay timeouts first of all as these are usually the culprit. The next couple of lines force iTunes to make the main window prominent (in case we have any sub-windows hanging around) and also to display the playlist we want to play prominently. The first version of this script didn't have that and everything generally worked fine so long as the last screen you looked at on iTunes was a music page. I left a TV show list open and found it no longer worked (caused an error with the button handling) so I've added this section to ensure you are always on the correct page.

tell window "iTunes" of application process "iTunes"
	click button 10 of window "iTunes" of application process "iTunes" of application "System Events"
	key code 125 using {command down}
	delay 0.2
	keystroke return

This section controls the little AirPlay button in the bottom right hand corner of iTunes. You can usually target buttons with their names rather than their index position but the AirPlay button is a special case as it has a different name depending on which device you have selected. I have 4 different AirPlay devices in my house so rather than writing a big if statement to check for each name and then press accordingly, I instead target the button by it's numerical index. You can find out the index of UI elements by using the fantastic UI Browser tool - it's a little bit pricey but worth the money if you are planning on doing a lot of AppleScripting. Once we've told iTunes to click on the button, we use key code 125 (which means the down key) in conjunction with the command button to jump down the entire context list to the "Multiple Speakers..." option. Originally, I wanted to read the list of devices, iterate through them, and then select the one we wanted but I had a lot of problems getting AppleScript to correctly read the context menu so went for this slightly more longwinded approach instead. Once the "Multiple Speakers..." option is selected, we hit return to make it open the window.

tell window "Multiple Speakers" of application process "iTunes" of application "System Events"
	activate
	click button 2
	tell table 1 of scroll area 1
		activate

This section is now specifically targeting the "Multiple Speakers" window which we just opened. The activate command allows us to start interacting with it, and by using UI Browser, we find that button 2 is the maximum volume setting. I decided to set this manually here (rather than using the existing volume) just in case I had it set really quiet (or muted) for any reason. This ensures that the music will always come through at it's maximum volume. The next section lets us select the table listing which shows each device that we are about to iterate through.

repeat with i from 1 to (count of every row)
	set rowcount to count of rows
	if rowcount > 1 then
		tell group 1 of row i
			activate
			if description of checkbox 1 as string = AppleTVName and value of checkbox 1 = 0 then
				set value of checkbox 1 to 1
				delay 0.5
			end if
		end tell
	end if
end repeat

repeat with i from 1 to (count of every row)
	set rowcount to count of rows
	if rowcount > 1 then
		tell group 1 of row i
			activate
			if description of checkbox 1 as string does not equal AppleTVName and value of checkbox 1 = 1 then
				set value of checkbox 1 to 0
				delay 0.2
			end if
		end tell
	end if
end repeat

I'm a big fan of the DRY (don't repeat yourself) principle of coding so you may wonder why there are two loops here which are essentially the same. The first goes through the list and turns the checkbox on for the device we want to play our alarm through. The second goes through the same list again, but turns off any devices that aren't our chosen alarm device. My first thought was to do one loop that went through and turned the checkbox on if the device was correct or off it wasn't. The problem with that approach is that you can't turn off the Computer audio until you've selected another device. Therefore, you have to go through once to turn on the chosen device and then through again to turn the others (if they were enabled) off. A little tedious but this is a bit hacky anyway! I've updated the delay in the first loop from 0.2 to 0.5 as I found that a 0.2 delay would occasionally not be enough time for an AirPlay speaker to be selected before the next loop comes in and turns of the Computer. This led to an alert in the script (thus pausing everything not leading to playback) which is obviously not ideal in an alarm clock...

tell window "Multiple Speakers" of application process "iTunes" of application "System Events"
	activate
	click button 3
end tell

Just for the sake of tidiness, this tell will close the "Multiple Speakers" window we opened.

tell application "iTunes"
	set shuffle of playlist PlaylistName to 1
	play playlist PlaylistName
end tell

This final section tells iTunes to shuffle our playlist (remember to turn the shuffle off — set shuffle of playlist PlaylistName to 0 — if you are going to send video via AirPlay) and then play it.

And there you have it! A small piece of AppleScript to enable audio and video alarms over AirPlay. If you have any comments or suggestions, please get in touch.

Update [11th Jan 2011]: I've amended two sections of the code. Firstly, I've added a line near the top which ensures that the playlist you want to play is selected and displayed as the main view. Previous versions worked perfectly when I tested them as I was in the "Music" section of iTunes but if you are in a video section (e.g. left on a TV show page) then there would be an error as it couldn't find the AirPlay button (as the index was different). The second change is a delay in the looping section has been increased from 0.2 to 0.5 as occasionally it took slightly longer than 0.2 seconds to select an AirPlay speaker. This caused a problem as the script would alert causing everything to pause. Both lines have been amended in the code at the top of the page and in the analysis afterwards.

Update [25th Oct 2011]: The button codes have changed in iTunes 10.4 and 10.5 so I've updated the above script so it will continue to work. The key part was changing click button 8 of window "iTunes" of application process to click button 10 of window "iTunes" of application process. Thanks to Thomas Engbjerg for letting me know it was broken!

Update [25th Jan 2012]: I've added this code to GitHub for easier managing. If something should break in the future (looking at you iTunes 10.6) then a fix will be put up there.

Update [15th Mar 2012]: iTunes 10.6 did break as expected - needed to add a delay 0.2 before the call to speak with the "Multiple Speakers" window due to some newly introduced lag. Updated here and on GitHub.

Update [12th May 2016]: This article is now outdated and the code no longer works with modern versions of iTunes. Please read my updated article to see how to create an AirPlay alarm clock with iTunes 11 and iTunes 12.

« Older Entries Newer Entries »